All You Need To Know About Build and Strategy
The legendary dragon Pokémon from the Distortion World has long been a fixture of the TCG meta, contorting games to its will and taking acclaim across many regional tournaments, such as a second place finish at the esteemed 2024 Europe International Championships.
The success of this renegade is down to its ability to channel energy to and from the Lost Zone, an area in gameplay separate to the discard pile, powering some of the strongest attacks in the game. This is the Lost Zone Giratina VSTAR archetype.
So what does the composition of this deck look like, and how can you harness the Lost Zone to accelerate vital Energy cards?
Table of Contents
What does the deck build look like?
The Giratina VSTAR Lost Zone setup has some staple cards that are fundamental to its performance. But in the post-rotation landscape, the deck has had to adapt, making changes to accommodate for the loss of Path to the Peak, while also welcoming a swathe of new cards from the Scarlet and Violet era.
These tweaks include the presence of a new ACE SPEC card, as well as a notable paradox Pokémon, helping to counter some of the meta’s top performers. Let’s take a look…
Deck List
How does the deck strategy work?
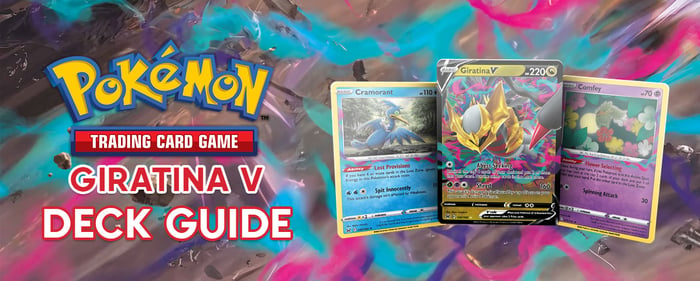
The key protagonist here is Origin Forme Giratina. As the heart of the deck, it appears in both its V and VSTAR versions, with the former evolving from the latter. Three versions of each provide a notable attacking presence.
Giratina VSTAR, the bulkier of the two versions, boasts the VSTAR Power attack, Star Requiem, which is the statement attack of the deck. In fact, Star Requiem is so powerful that when used it instantly knocks out your opponent’s active Pokémon. This OHKO attack from the demonic legendary is caveated by the fact it costs one Grass and one Psychic Energy, can only be used if you have 10 or more cards in your Lost Zone…and can only be used once per game. Nonetheless, an instant knockout is pretty frightening. Snorlax stall, Charizard ex, Lugia VSTAR – none of them stand a chance.
Giratina VSTAR's second attack can’t be dismissed either. Lost Impact, which costs a Grass, Psychic and Colourless Energy does a hefty 280 damage. In exchange, you must move two Energy cards attached to Giratina VSTAR in the Lost Zone. Incredibly, this just fuels the beastly attack, Star Requiem, and synergises with other Pokémon in the deck.
Of course, to get Giratina VSTAR into play, you first need to evolve your Giratina V, which are capable enough in their own right. Giratina V has a respectable 220HP, and can further help to peddle your Lost Zone efforts with its attack, Abyss Seeking. Abyss Seeking allows you to look at the top four cards of your deck and add two to your hand and place two in the Lost Zone.
Giratina V can also use the attack, Shred, costing one Grass, one Psychic, and one Colourless Energy. Shred does a solid 160 damage, and can critically bypass any effects on your opponent’s active Pokémon. This means, for example, that a Miltank with the ability Miracle Body would be susceptible, despite the fact that its ability normally stops all damage from V Pokémon. Giratina V is quite the infiltrator.
Of almost equal importance to the legendary ghostly dragon are the four Comfey – key components of any Lost Zone deck build. Comfey's ability, Flower Selecting, allows you to look at the top two cards of your deck and add one to your hand and one to the Lost Zone (provided Comfey is in the active spot). This plays to the modus operandi of the archetype – load up the Lost Zone and subsequently accelerate Energy to your Giratina cards.
While you get your Giratina set-up in place, you can use Cramorant to present an early-game threat, once again harnessing the Lost Zone engine. Cramorant's ability, Lost Provisions.
Beyond that, you have attackers that can help you to snipe your opponent’s benched Pokémon in the form of Radiant Greninja and Sableye. The ninja frog can hit two benched Pokémon for 90 damage with its attack Moonlight Shuriken. Then, blending into the Lost Zone build, you have Sableye who’s attack Lost Mine allows you to place 12 damage counters on your opponent’s Pokémon if you have 10 or more cards in the Lost Zone. An absolute gem of a card in chipping down larger cards, such as the 320HP Charizard ex, ready to be taken out with attacks such as Lost Impact.
Last but not least among the attackers we have Iron Leaves ex, there to ward off the threat of Charizard ex, which of course appears in its Tera form. The Paradox Pokémon’s ability, Rapid Vernier, helps you to get that smooth transition into this match up, as if you play Iron Leaves ex from your hand to your bench, you are able to switch it to the active spot and move any amount of Energy all during the same turn. Charizard ex will quickly be face-to-face with a Grass attacker capable of a OHKO shot.

Then there’s the range of cards that bring this deck to life – among them many staples of the meta, such as Buddy-Buddy Poffin, Iono, Nest Ball, and Boss’s Orders. Players are typically well versed in the role these cards play, though there are others in the Lost Zone build with an interesting purpose.
Starting off with Jet Energy – a Special Energy card with a unique added effect. If you attach the card from your hand to one of your benched Pokémon, you may then switch that Pokémon with the one in your active spot. Beyond its obvious suitability to powering up Giratina VSTAR's Abyss Seeking, Jet Energy can also help to accelerate gameplay in this build. This is because it gives you a means of using three Flower Selecting in one turn. With three Comfey in play, you can use a first Flower Selecting, then attach a Jet Energy to a second Comfey, bringing it into the active spot, use Flower Selecting again, and then retreat to the third Comfey and use Flower Selecting once more. In doing so, you can add three cards to the Lost Zone while keeping your big hitters safe. And you won’t even have to use a single Switch Cart or Escape Rope.
Then we have Colress’s Experiment, which is perhaps one of the most important cards in the deck. This Supporter card neatly balances the demand to draw, with the need to fire some to the Lost Zone. And so, with Colress’s Experiment, you can sift and find those game-changing cards, such as ACE SPEC Prime Catcher, while also stacking the Lost Zone.
Finally, there’s the Trainer card, Mirage Gate. Mirage Gate is there to keep things moving once your Lost Zone is already stacked. Once you have seven or more cards in the Lost Zone, you can use Mirage Gate to search your deck for up to two basic Energy cards of different types and attach them to your Pokémon in any way you like. This means that you have a sure-fire way to keep powering up that brutal Lost Impact attack.
Deck Upgrades
The Giratina VSTAR archetype has many strengths, but there is always room for variation. And the first place to look is the deck’s Stadium card. While Artazon is a solid inclusion for getting Comfey accelerated into play, there are alternatives. For example, Lost City can help to bolster your Lost Zone needs. Lost City states that whenever a Pokémon is knocked out – be it yours or your opponent’s – then it is sent to the Lost Zone. A handy help in this set up.

While the attackers in this build are fairly consistent, there have been examples of players successfully introducing Bloodmoon Ursaluna ex, yielding results that have led to strong tournament performance. Able to hit for 240 damage, Bloodmoon Ursaluna ex is a solid late game attacker, with its ability Seasoned Skill reducing the cost of its signature attack by one Colourless Energy for every Prize Card the opponent has taken. And because of the deck’s natural spread across Grass, Psychic and Water Energy cards, this bear from Kitakami is an easy integration.

Finally, we have Spiritomb, which has become an extremely strong Pokémon in the current meta. Spiritomb's spooky ability, Fettered in Misfortune, is what makes it such a boon as it shuts down the abilities of all basic V Pokémon in play. In essence this means that stalls decks can’t effectively run Rotom V, powerful Lugia decks can’t use Lumineon V to close out games, and decks such as Charizard ex lose the benefit of both. It is a heck of a hex for the opponent.

While new decks such as Raging Bolt ex and Gardevoir ex with Munkidori are surfacing and staking a claim for the top spot, Giratina VSTAR is remaining there or thereabouts in the top spots, owing to its ability to reap the rewards of Lost Zone. So, how would you get the Lost Zone working for you?
Check out the full collection of Pokémon Trading Cards.


 3 x
3 x  3 x
3 x  1 x
1 x  1 x
1 x  1 x
1 x  1 x
1 x  1 x
1 x  4 x
4 x  2 x
2 x  2 x
2 x  1 x
1 x  4 x
4 x  3 x
3 x  1 x
1 x  4 x
4 x  3 x
3 x  2 x
2 x  2 x
2 x  2 x
2 x  1 x
1 x  1 x
1 x  1 x
1 x  4 x
4 x  3 x
3 x  3 x
3 x  3 x
3 x 

